m (fixed item component and added templates.) Tags: Visual edit apiedit |
(updated templates) |
||
| (8 intermediate revisions by 5 users not shown) | |||
| Line 1: | Line 1: | ||
| − | {{ |
+ | {{Blueprint}} |
| + | [[File:Hats Scarlet Coif.png|thumb|220x220px]] |
||
| − | |||
| − | [[File:Hats ScarletCoifBlueprint.png|right|200px]] |
||
=='''Scarlet Coif'''== |
=='''Scarlet Coif'''== |
||
| Line 8: | Line 7: | ||
* Item Level: 15 |
* Item Level: 15 |
||
* Base Power: +330 {{Misc Power Icon}} |
* Base Power: +330 {{Misc Power Icon}} |
||
| + | * Unlocks: [[Magic Top]] |
||
| + | {{Item Skill Requirements|Textile=180|Arts=180}} |
||
| − | ==''' |
+ | =='''Phases of Construction'''== |
| + | : All blueprints have 5 phases of construction on the way to mastering an item. Each phase unlocks additional perks for that particular item or can open up new blueprint(s) for you to make. |
||
| − | |||
| − | {| class="boost-table" border="1" width="100%" |
||
| − | |- |
||
| − | | style="text-align:center" | {{CSkill Metal Working Icon}} |
||
| − | | style="text-align:center" | N/a |
||
| − | | style="text-align:center" | {{CSkill Wood Working Icon}} |
||
| − | | style="text-align:center" | N/a |
||
| − | | style="text-align:center" | {{CSkill Textile Working Icon}} |
||
| − | | style="text-align:center" | 190 |
||
| − | | style="text-align:center" | {{CSkill Alchemy Icon}} |
||
| − | | style="text-align:center" | N/a |
||
| − | |- |
||
| − | | style="text-align:center" | {{CSkill Magic Icon}} |
||
| − | | style="text-align:center" | N/a |
||
| − | | style="text-align:center" | {{CSkill Weapon Crafting Icon}} |
||
| − | | style="text-align:center" | N/a |
||
| − | | style="text-align:center" | {{CSkill Armor Crafting Icon}} |
||
| − | | style="text-align:center" | N/a |
||
| − | | style="text-align:center" | {{CSkill Arts And Crafts Icon}} |
||
| − | | style="text-align:center" | 190 |
||
| − | |- |
||
| − | | style="text-align:center" | {{CSkill Jewelry Icon}} |
||
| − | | style="text-align:center" | N/a |
||
| − | | style="text-align:center" | {{CSkill Rune Writing Icon}} |
||
| − | | style="text-align:center" | N/a |
||
| − | | style="text-align:center" | {{CSkill Tinkering Icon}} |
||
| − | | style="text-align:center" | N/a |
||
| − | | |
||
| − | | |
||
| − | |} |
||
| − | |||
| − | =='''Stages of Construction'''== |
||
| − | |||
| − | : All blueprints have 5 stages of construction on the way to mastering an item. Each stage unlocks additional perks for that particular item and opens up new blueprint(s) for you to make. |
||
| − | |||
| − | |||
| − | ==='''Phase 1'''=== |
||
| − | |||
| − | {| class="craft-table" border="1" width="100%" |
||
| − | |- |
||
| − | ! Resources per Craft |
||
| − | ! Components per Craft |
||
| − | ! # Crafts to next phase |
||
| − | ! Perk Unlocked |
||
| − | ! Total Resources needed |
||
| − | ! Total Components needed |
||
| − | |- |
||
| − | | style="text-align:center" | 55 {{Resource Leather Icon}} / 16 {{Resource Fabric Icon}} |
||
| − | | style="text-align:center" | 2 [[File:Good_Plumed_Hat.png|30px|link=http://shop-heroes.wikia.com/wiki/File:Plumed_Hat.png]] |
||
| − | | style="text-align:center" | 10 |
||
| − | | style="text-align:center" | Efficiency Increased: -11 {{Resource Leather Icon}} |
||
| − | | style="text-align:center" | 550 {{Resource Leather Icon}} / 160 {{Resource Fabric Icon}} |
||
| − | | style="text-align:center" | 20 [[File:Good_Plumed_Hat.png|30px|link=http://shop-heroes.wikia.com/wiki/File:Plumed_Hat.png]] |
||
| − | |} |
||
| − | |||
| − | ==='''Phase 2'''=== |
||
| − | |||
| − | {| class="craft-table" border="1" width="100%" |
||
| − | |- |
||
| − | ! Resources per Craft |
||
| − | ! Components per Craft |
||
| − | ! # Crafts to next phase |
||
| − | ! Perk Unlocked |
||
| − | ! Total Resources needed |
||
| − | ! Total Components needed |
||
| − | |- |
||
| − | | style="text-align:center" | 44 {{Resource Leather Icon}} / 16 {{Resource Fabric Icon}} |
||
| − | | style="text-align:center" | 2 [[File:Good_Plumed_Hat.png|30px|link=http://shop-heroes.wikia.com/wiki/File:Plumed_Hat.png]] |
||
| − | | style="text-align:center" | 12 |
||
| − | | style="text-align:center" | {{Price Increase 25%}} |
||
| − | | style="text-align:center" | 528 {{Resource Leather Icon}} / 192 {{Resource Fabric Icon}} |
||
| − | | style="text-align:center" | 24 [[File:Good_Plumed_Hat.png|30px|link=http://shop-heroes.wikia.com/wiki/File:Plumed_Hat.png]] |
||
| − | |} |
||
| − | |||
| − | ==='''Phase 3'''=== |
||
| − | |||
| − | {| class="craft-table" border="1" width="100%" |
||
| − | |- |
||
| − | ! Resources per Craft |
||
| − | ! Components per Craft |
||
| − | ! # Crafts to next phase |
||
| − | ! Perk Unlocked |
||
| − | ! Total Resources needed |
||
| − | ! Total Components needed |
||
| − | |- |
||
| − | | style="text-align:center" | 44 {{Resource Leather Icon}} / 16 {{Resource Fabric Icon}} |
||
| − | | style="text-align:center" | 2 [[File:Good_Plumed_Hat.png|30px|link=http://shop-heroes.wikia.com/wiki/File:Plumed_Hat.png]] |
||
| − | | style="text-align:center" | 18 |
||
| − | | style="text-align:center" | Unlock: [[Magic Top]] |
||
| − | | style="text-align:center" | 792 {{Resource Leather Icon}} / 288 {{Resource Fabric Icon}} |
||
| − | | style="text-align:center" | 36 [[File:Good_Plumed_Hat.png|30px|link=http://shop-heroes.wikia.com/wiki/File:Plumed_Hat.png]] |
||
| − | |} |
||
| − | |||
| − | ==='''Phase 4'''=== |
||
| − | |||
| − | {| class="craft-table" border="1" width="100%" |
||
| − | |- |
||
| − | ! Resources per Craft |
||
| − | ! Components per Craft |
||
| − | ! # Crafts to next phase |
||
| − | ! Perk Unlocked |
||
| − | ! Total Resources needed |
||
| − | ! Total Components needed |
||
| − | |- |
||
| − | | style="text-align:center" | 44 {{Resource Leather Icon}} / 16 {{Resource Fabric Icon}} |
||
| − | | style="text-align:center" | 2 [[File:Good_Plumed_Hat.png|30px|link=http://shop-heroes.wikia.com/wiki/File:Plumed_Hat.png]] |
||
| − | | style="text-align:center" | 30 |
||
| − | | style="text-align:center" | {{Time Decreased 25%}} |
||
| − | | style="text-align:center" | 1,320 {{Resource Leather Icon}} / 480 {{Resource Fabric Icon}} |
||
| − | | style="text-align:center" | 60 [[File:Good_Plumed_Hat.png|30px|link=http://shop-heroes.wikia.com/wiki/File:Plumed_Hat.png]] |
||
| − | |} |
||
| − | |||
| − | ==='''Phase 5'''=== |
||
| − | |||
| − | {| class="craft-table" border="1" width="100%" |
||
| − | |- |
||
| − | ! Resources per Craft |
||
| − | ! Components per Craft |
||
| − | ! # Crafts to next phase |
||
| − | ! Perk Unlocked |
||
| − | ! Total Resources needed |
||
| − | ! Total Components needed |
||
| − | |- |
||
| − | | style="text-align:center" | 44 {{Resource Leather Icon}} / 16 {{Resource Fabric Icon}} |
||
| − | | style="text-align:center" | 2 [[File:Good_Plumed_Hat.png|30px|link=http://shop-heroes.wikia.com/wiki/File:Plumed_Hat.png]] |
||
| − | | style="text-align:center" | 50 |
||
| − | | style="text-align:center" | Quality Increased: {{Quality Good Icon}} |
||
| − | | style="text-align:center" | 2,200 {{Resource Leather Icon}} / 800 {{Resource Fabric Icon}} |
||
| − | | style="text-align:center" | 100 [[File:Good_Plumed_Hat.png|30px|link=http://shop-heroes.wikia.com/wiki/File:Plumed_Hat.png]] |
||
| − | |} |
||
| − | |||
| − | ==='''Total Cost'''=== |
||
| − | |||
| − | : Total resources needed to fully master the item: |
||
| − | |||
| − | :: 5,390 {{Resource Leather Icon}} / 1,920 {{Resource Fabric Icon}} |
||
| − | |||
| − | : Total components needed to fully master the item: |
||
| − | |||
| − | :: 240 [[File:Good_Plumed_Hat.png|30px|link=http://shop-heroes.wikia.com/wiki/File:Plumed_Hat.png]] |
||
| − | |||
| − | |||
| − | =='''Used In'''== |
||
| − | |||
| − | : Recipes that use this item. |
||
| − | |||
| − | {| class="recipe-table" border="1" width="100%" |
||
| − | |- |
||
| − | | style="text-align:center" | |
||
| − | | style="text-align:center" | |
||
| − | | style="text-align:center" | |
||
| − | | style="text-align:center" | |
||
| − | |- |
||
| − | | style="text-align:center" | |
||
| − | | style="text-align:center" | |
||
| − | | style="text-align:center" | |
||
| − | | style="text-align:center" | |
||
| − | |} |
||
| − | |||
| − | =='''Crafting Times'''== |
||
| − | |||
| − | : Crafting times shown are to give a rough estimate of how much a Crafter's skills affect an item's crafting time at various increments. The approximate crafting time formula is as such: (Item Skill Requirement / Total Worker Skill) + ([repeat for] Additional Skill Requirements) = Minutes Crafting Time. If you have the exact time, please replace the italicized numbers with bolded ones. |
||
| − | |||
| − | {| class="crafttime-table" border="1" width="100%" |
||
| − | |- |
||
| − | ! Req. Worker Skills At |
||
| − | ! Before Time Decrease |
||
| − | ! After Time Decrease |
||
| − | |- |
||
| − | | style="text-align:center" | - - |
||
| − | | style="text-align:center" | - - {{Misc Time Icon}} |
||
| − | | style="text-align:center" | N/a |
||
| − | |- |
||
| − | | style="text-align:center" | - - |
||
| − | | style="text-align:center" | - - {{Misc Time Icon}} |
||
| − | | style="text-align:center" | N/a |
||
| − | |- |
||
| − | | style="text-align:center" | - - |
||
| − | | style="text-align:center" | - - {{Misc Time Icon}} |
||
| − | | style="text-align:center" | N/a |
||
| − | |- |
||
| − | | style="text-align:center" | - - |
||
| − | | style="text-align:center" | - -{{Misc Time Icon}} |
||
| − | | style="text-align:center" | N/a |
||
| − | |- |
||
| − | | style="text-align:center" | - - |
||
| − | | style="text-align:center" | - - {{Misc Time Icon}} |
||
| − | | style="text-align:center" | N/a |
||
| − | |} |
||
| − | |||
| − | =='''Price'''== |
||
| − | |||
| − | : Price reflects how much an item will sell for to Heroes. An item's quality will affect the price. Numbers shown do not take into account surcharge or discount actions. |
||
| − | |||
| − | {| class="itemprice-table" border="1" width="100%" |
||
| − | |- |
||
| − | ! Item Quality |
||
| − | ! Before Price Increase |
||
| − | ! After Price Increase |
||
| − | |- |
||
| − | | style="text-align:center" | {{Quality Common Icon}} |
||
| − | | style="text-align:center" | 9,100 {{Misc Coin Icon}} |
||
| − | | style="text-align:center" | - - {{Misc Coin Icon}} |
||
| − | |- |
||
| − | | style="text-align:center" | {{Quality Good Icon}} |
||
| − | | style="text-align:center" | 11,380 {{Misc Coin Icon}} |
||
| − | | style="text-align:center" | N/a |
||
| − | |- |
||
| − | | style="text-align:center" | {{Quality Great Icon}} |
||
| − | | style="text-align:center" | 18,200 {{Misc Coin Icon}} |
||
| − | | style="text-align:center" | 22,750 {{Misc Coin Icon}} |
||
| − | |- |
||
| − | | style="text-align:center" | {{Quality Flawless Icon}} |
||
| − | | style="text-align:center" | 27,300 {{Misc Coin Icon}} |
||
| − | | style="text-align:center" | N/a |
||
| − | |- |
||
| − | | style="text-align:center" | {{Quality Epic Icon}} |
||
| − | | style="text-align:center" | 45,500 {{Misc Coin Icon}} |
||
| − | | style="text-align:center" | N/a |
||
| − | |- |
||
| − | | style="text-align:center" | {{Quality Legendary Icon}} |
||
| − | | style="text-align:center" | 91,000 {{Misc Coin Icon}} |
||
| − | | style="text-align:center" | N/a |
||
| − | |} |
||
| + | {{Phase|PhaseNum=1|Crafts = 6|Leather=55|Fabric=16| |
||
| − | =='''Shop Exp'''== |
||
| + | Component 1={{Item Precraft Component|Item=Plumed Hat|Category=|Quality=Good}}|Component 1 Amount=2| |
||
| + | Perk={{Item Efficiency Increased|Number=-11|Resource=Leather}}}} |
||
| + | {{Phase|PhaseNum=2|PrevCrafts=6|Crafts = 12|Leather=44|Fabric=16| |
||
| − | : Increasing your shop level is done by selling the various items you craft. Initial testing shows that: Selling items on the auction house will not earn you shop exp. An item's quality will affect the amount of shop exp earned. |
||
| + | Component 1={{Item Precraft Component|Item=Plumed Hat|Category=|Quality=Good}}|Component 1 Amount=2| |
||
| + | Perk={{Price Increase +25%}}}} |
||
| + | {{Phase|PhaseNum=3|PrevCrafts=12|Crafts = 22|Leather=44|Fabric=16| |
||
| − | {| class="itemexp-table" border="1" width="100%" |
||
| + | Component 1={{Item Precraft Component|Item=Plumed Hat|Category=|Quality=Good}}|Component 1 Amount=2| |
||
| − | |- |
||
| + | Perk={{Item Blueprint Unlocked|Item=Magic Top}}}} |
||
| − | ! {{Quality Common Icon}} |
||
| − | ! {{Quality Good Icon}} |
||
| − | ! {{Quality Great Icon}} |
||
| − | ! {{Quality Flawless Icon}} |
||
| − | ! {{Quality Epic Icon}} |
||
| − | ! {{Quality Legendary Icon}} |
||
| − | |- |
||
| − | | style="text-align:center" | - - exp |
||
| − | | style="text-align:center" | - - exp |
||
| − | | style="text-align:center" | - - exp |
||
| − | | style="text-align:center" | - - exp |
||
| − | | style="text-align:center" | - - exp |
||
| − | | style="text-align:center" | - - exp |
||
| − | |} |
||
| + | {{Phase|PhaseNum=4|PrevCrafts=22|Crafts = 38|Leather=44|Fabric=16| |
||
| − | =='''Power Rating'''== |
||
| + | Component 1={{Item Precraft Component|Item=Plumed Hat|Category=|Quality=Good}}|Component 1 Amount=2| |
||
| + | Perk={{Time Decreased -25%}}}} |
||
| + | {{Phase|PhaseNum=5|PrevCrafts=38|Crafts = 60|Leather=44|Fabric=16| |
||
| − | : The Power Rating is a base number added to your heroes strength (which is further multiplied by the Hero's tier). Higher quality versions of an item have a larger Power Rating. |
||
| + | Component 1={{Item Precraft Component|Item=Plumed Hat|Category=|Quality=Good}}|Component 1 Amount=2| |
||
| + | Perk={{Item Quality Increased|Item=Scarlet Coif|Quality=Good}}}} |
||
| + | {{Item Mastery Cost|Crafts To Mastery = 60| |
||
| − | {| class="power-table" border="1" width="100%" |
||
| + | Leather Start Amount = 55|Crafts To Leather Perk = 6|Leather End Amount = 44| |
||
| − | |- |
||
| + | Fabric End Amount = 16| |
||
| − | ! {{Quality Common Icon}} |
||
| + | Component 1 = {{Item Precraft Component|Item=Plumed Hat|Category=|Quality=Good}}|Component 1 End Amount = 2}} |
||
| − | ! {{Quality Good Icon}} |
||
| − | ! {{Quality Great Icon}} |
||
| − | ! {{Quality Flawless Icon}} |
||
| − | ! {{Quality Epic Icon}} |
||
| − | ! {{Quality Legendary Icon}} |
||
| − | |- |
||
| − | | style="text-align:center" | 330 {{Misc Power Icon}} |
||
| − | | style="text-align:center" | 363 {{Misc Power Icon}} |
||
| − | | style="text-align:center" | 396 {{Misc Power Icon}} |
||
| − | | style="text-align:center" | 429 {{Misc Power Icon}} |
||
| − | | style="text-align:center" | 495 {{Misc Power Icon}} |
||
| − | | style="text-align:center" | 660 {{Misc Power Icon}} |
||
| − | |} |
||
| + | {{Used In| |
||
| − | =='''Upgrade Costs'''== |
||
| + | Recipe 1 = [[Elven Coif]]|Quality 1 = {{Quality Common Icon}}|Amount 1 = 2| |
||
| + | Recipe 2 = [[Cowboy Hat]]|Quality 2 = {{Quality Great Icon}}|Amount 2 = 1| |
||
| + | }} |
||
| + | {{ItemCraftTimeV2|Textile=180|Arts=180}} |
||
| − | : When you craft a good or higher quality item, you are given the chance to upgrade that item to the next quality tier for gems. You can only do this once per craft. Higher quality tiers will cost more gems than lower ones. |
||
| + | {{Price25Percent|price = 9740}} |
||
| − | {| class="qualityupgrade-table" border="1" width="100%" |
||
| − | |- |
||
| − | | style="text-align:center" | {{Quality Good Icon}} --> {{Quality Great Icon}} |
||
| − | | style="text-align:center" | {{Quality Great Icon}} --> {{Quality Flawless Icon}} |
||
| − | | style="text-align:center" | {{Quality Flawless Icon}} --> {{Quality Epic Icon}} |
||
| − | | style="text-align:center" | {{Quality Epic Icon}} --> {{Quality Legendary Icon}} |
||
| − | |- |
||
| − | | style="text-align:center" | 17 {{Misc Gem Icon}} |
||
| − | | style="text-align:center" | 28 {{Misc Gem Icon}} |
||
| − | | style="text-align:center" | 42 {{Misc Gem Icon}} |
||
| − | | style="text-align:center" | - - {{Misc Gem Icon}} |
||
| − | |} |
||
| + | {{ShopExp|exp = 2057}} |
||
| − | =='''Fusion Times'''== |
||
| + | {{ItemPower|power = 330}} |
||
| − | : The following times is based on using exact copies with the same quality. Mixed item and mixed quality fusions will drastically alter the time and outcome of fusions. |
||
| + | {{UpgradeCostV2|Cost1=17|Cost2=28|Cost3=42|Cost4=70}} |
||
| − | {| class="fusion-table" border="1" width="100%" |
||
| − | |- |
||
| − | | style="text-align:center" | {{Quality Common Icon}}--> |
||
| − | {{Quality Good Icon}} |
||
| − | | style="text-align:center" | {{Quality Good Icon}}--> |
||
| − | {{Quality Great Icon}} |
||
| − | | style="text-align:center" | {{Quality Great Icon}}--> |
||
| − | {{Quality Flawless Icon}} |
||
| − | | style="text-align:center" | {{Quality Flawless Icon}}--> |
||
| − | {{Quality Epic Icon}} |
||
| − | | style="text-align:center" | {{Quality Epic Icon}}--> |
||
| − | {{Quality Legendary Icon}} |
||
| − | |- |
||
| − | | style="text-align:center" | - - {{Misc Time Icon}} |
||
| − | | style="text-align:center" | - - {{Misc Time Icon}} |
||
| − | | style="text-align:center" | - - {{Misc Time Icon}} |
||
| − | | style="text-align:center" | - - {{Misc Time Icon}} |
||
| − | | style="text-align:center" | - - {{Misc Time Icon}} |
||
| − | |} |
||
| + | {{FusionTimesV2|Level=15}} |
||
---- |
---- |
||
[[Category:Hats]] |
[[Category:Hats]] |
||
| − | |} |
||
Latest revision as of 18:34, 31 August 2019
| Equipment Navigation: | ||||||||||||
|---|---|---|---|---|---|---|---|---|---|---|---|---|
| Weapons | Garments | Accessories | ||||||||||


Scarlet Coif
- Unlocked By: Light Visage
- Item Level: 15
- Base Power: +330

- Unlocks: Magic Top
Worker Skill Requirements

|

|

|

|

|

|

|

| |||
| 0 | 0 | 180 | 0 | 0 | 0 | 0 | 180 | 0 | 0 | 0 |
Phases of Construction
- All blueprints have 5 phases of construction on the way to mastering an item. Each phase unlocks additional perks for that particular item or can open up new blueprint(s) for you to make.
| Phase 1 | |||||||||||||||||||||||||||||||||||||||||||||||||||||
|---|---|---|---|---|---|---|---|---|---|---|---|---|---|---|---|---|---|---|---|---|---|---|---|---|---|---|---|---|---|---|---|---|---|---|---|---|---|---|---|---|---|---|---|---|---|---|---|---|---|---|---|---|---|
| Resources per Craft | Components per Craft | # Crafts to next phase | Perk Unlocked | Total Resources needed for this Phase | Total Components needed for this Phase | ||||||||||||||||||||||||||||||||||||||||||||||||
|
|
6 | 
|
|
| ||||||||||||||||||||||||||||||||||||||||||||||||
| Phase 2 | |||||||||||||||||||||||||||||||||||||||||||||||||||||
|---|---|---|---|---|---|---|---|---|---|---|---|---|---|---|---|---|---|---|---|---|---|---|---|---|---|---|---|---|---|---|---|---|---|---|---|---|---|---|---|---|---|---|---|---|---|---|---|---|---|---|---|---|---|
| Resources per Craft | Components per Craft | # Crafts to next phase | Perk Unlocked | Total Resources needed for this Phase | Total Components needed for this Phase | ||||||||||||||||||||||||||||||||||||||||||||||||
|
|
12 | 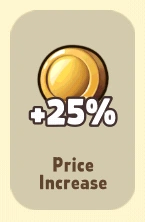
|
|
| ||||||||||||||||||||||||||||||||||||||||||||||||
| Phase 3 | |||||||||||||||||||||||||||||||||||||||||||||||||||||
|---|---|---|---|---|---|---|---|---|---|---|---|---|---|---|---|---|---|---|---|---|---|---|---|---|---|---|---|---|---|---|---|---|---|---|---|---|---|---|---|---|---|---|---|---|---|---|---|---|---|---|---|---|---|
| Resources per Craft | Components per Craft | # Crafts to next phase | Perk Unlocked | Total Resources needed for this Phase | Total Components needed for this Phase | ||||||||||||||||||||||||||||||||||||||||||||||||
|
|
22 | 
|
|
| ||||||||||||||||||||||||||||||||||||||||||||||||
| Phase 4 | |||||||||||||||||||||||||||||||||||||||||||||||||||||
|---|---|---|---|---|---|---|---|---|---|---|---|---|---|---|---|---|---|---|---|---|---|---|---|---|---|---|---|---|---|---|---|---|---|---|---|---|---|---|---|---|---|---|---|---|---|---|---|---|---|---|---|---|---|
| Resources per Craft | Components per Craft | # Crafts to next phase | Perk Unlocked | Total Resources needed for this Phase | Total Components needed for this Phase | ||||||||||||||||||||||||||||||||||||||||||||||||
|
|
38 | 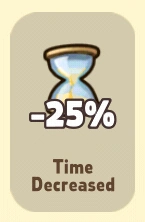
|
|
| ||||||||||||||||||||||||||||||||||||||||||||||||
| Phase 5 | |||||||||||||||||||||||||||||||||||||||||||||||||||||
|---|---|---|---|---|---|---|---|---|---|---|---|---|---|---|---|---|---|---|---|---|---|---|---|---|---|---|---|---|---|---|---|---|---|---|---|---|---|---|---|---|---|---|---|---|---|---|---|---|---|---|---|---|---|
| Resources per Craft | Components per Craft | # Crafts to next phase | Perk Unlocked | Total Resources needed for this Phase | Total Components needed for this Phase | ||||||||||||||||||||||||||||||||||||||||||||||||
|
|
60 | 
|
|
| ||||||||||||||||||||||||||||||||||||||||||||||||
Item Mastery Cost
Total resources needed to fully master the item:
| 0 | 0 | ||
|---|---|---|---|
| 0 | 0 | ||
| 2,706 | 960 | ||
| 0 | 0 | ||
| 0 | 0 |
Total components needed to fully master the item:
|
|
120 | N/A | 0 |
|---|
Used In
| Pre-Craft For: | ||
|---|---|---|
| Recipe | Quality | Amount |
| Elven Coif | 2 | |
| Cowboy Hat | 1 | |
| - - | - - | - - |
| - - | - - | - - |
Item Crafting Times
- Crafting times (in minutes) are determined by the sum of Skill requirements divided by their respective total worker skills. It never goes below 5s. Below is what the crafting time would be under various worker skill totals.
| Estimated Craft Times | |||||||
|---|---|---|---|---|---|---|---|
| Worker Skill and Craft Times | |||||||
| Skill Type | Skill Value | 10 | 50 | 100 | 200 | 500 | 1000 |
| 0 | 1s | 1s | 1s | 1s | 1s | 1s | |
| 0 | 1s | 1s | 1s | 1s | 1s | 1s | |
| 180 | 18m | 3m36s | 1m48s | 54s | 22s | 11s | |
| 0 | 1s | 1s | 1s | 1s | 1s | 1s | |
| 0 | 1s | 1s | 1s | 1s | 1s | 1s | |
| 0 | 1s | 1s | 1s | 1s | 1s | 1s | |
| 0 | 1s | 1s | 1s | 1s | 1s | 1s | |
| 180 | 18m | 3m36s | 1m48s | 54s | 22s | 11s | |
| 0 | 1s | 1s | 1s | 1s | 1s | 1s | |
| 0 | 1s | 1s | 1s | 1s | 1s | 1s | |
| 0 | 1s | 1s | 1s | 1s | 1s | 1s | |
| 36m | 7m12s | 3m36s | 1m48s | 43s | 22s | ||
| 27m | 5m24s | 2m42s | 1m21s | 32s | 16s | ||
Item Prices
- Price reflects how much an item will sell for to Heroes. An item's quality will affect the price.
| Base Price / Price +25% Table | ||||||
|---|---|---|---|---|---|---|
| Before Price Increase | After Price Increase | |||||
| Item Quality | Discount | Price | Surcharge | Discount | Price | Surcharge |
| 7,305 |
9,740 |
12,175 |
9,131 |
12,175 |
15,219 | |
| 9,131 |
12,175 |
15,219 |
11,414 |
15,219 |
19,023 | |
| 14,610 |
19,480 |
24,350 |
18,263 |
24,350 |
30,438 | |
| 21,915 |
29,220 |
36,525 |
27,394 |
36,525 |
45,656 | |
| 36,525 |
48,700 |
60,875 |
45,656 |
60,875 |
76,094 | |
| 73,050 |
97,400 |
121,750 |
91,313 |
121,750 |
152,188 | |
| 182,625 |
243,500 |
304,375 |
228,281 |
304,375 |
380,469 | |
Shopkeeper Experience Gains
- Increasing your Shopkeeper Level is done by selling the various items you craft. Selling items on the auction house will not earn you shopkeeper exp. An item's quality will affect the amount of shopkeeper exp earned.
| 2,057 |
2,571 |
4,114 |
6,171 |
10,285 |
20,570 |
51,425 |
Power Ratings
- The Power Rating is how much will be added to the quest/arena power of the hero who equips the item. Higher quality versions of an item have a larger Power Rating.
| +330 |
+363 |
+396 |
+429 |
+495 |
+660 |
+1,650 |
Upgrade Costs
- When you craft a good or higher quality item, you are given the chance to upgrade that item to the next quality tier for gems. You can only do this once per craft. Higher quality tiers will cost more gems than lower ones.
| 17 |
28 |
42 |
70 |
Level 15 Fusion Times
- The following times are based on using exact copies with the same quality. Mixed item and mixed quality fusions will drastically alter the time and outcome of fusions. The Time is determined by the level and quality of the item.
|
|
|
|
|
|
| 6m |
14m16s |
23m41s |
33m56s |
44m52s |
56m21s |